December 27 2017 – Lindsey Neill
![Christmas Up North Quilt [Plus Wreath & Holiday Lights Tutorial!]](http://penandpaperpatterns.com/cdn/shop/articles/IMG_7785-01-01_{width}x.jpeg?v=1587334869)
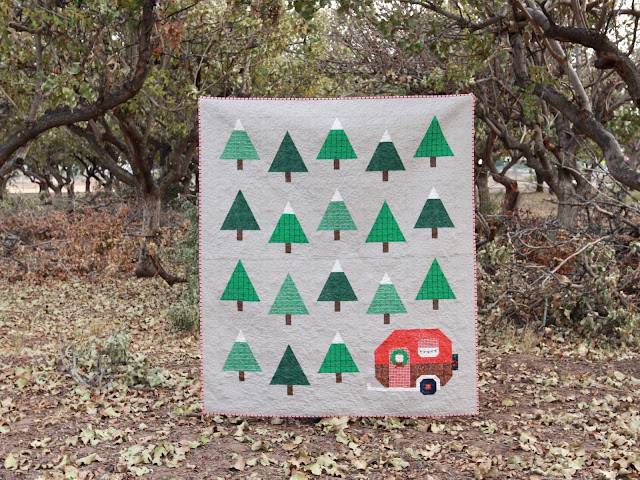
Christmas Up North Quilt [Plus Wreath & Holiday Lights Tutorial!]
 |
| I gave myself 5 minutes to take this photo, so apologies for the graininess and overall quality of it... |
I did a tutorial for the snow-capped trees that you can find HERE, but keep reading below if you want to Christmas-fy (that's a real word, right??) your camper too!
The printable templates for the wreath are at the very end of this post!
To make the wreath you'll need a 4 1/2" square of both Heat N' Bond Lite (my favorite interfacing for applique) and green fabric.
Print the template below at 100% or "Do Not Scale" and trace the wreath shape with a pen or marker onto the paper side of the Heat N' Bond Lite. I find I'm able to see the shape of wreath perfectly through the Heat N' Bond without using a light source, but if you're struggling to see the wreath shape through the Heat N' Bond I recommend holding them up to a light source instead (a well-lit window is perfect!) and then tracing it.
Following the directions on the Heat N' Bond package, adhere the interfacing to the wrong side of the green fabric.
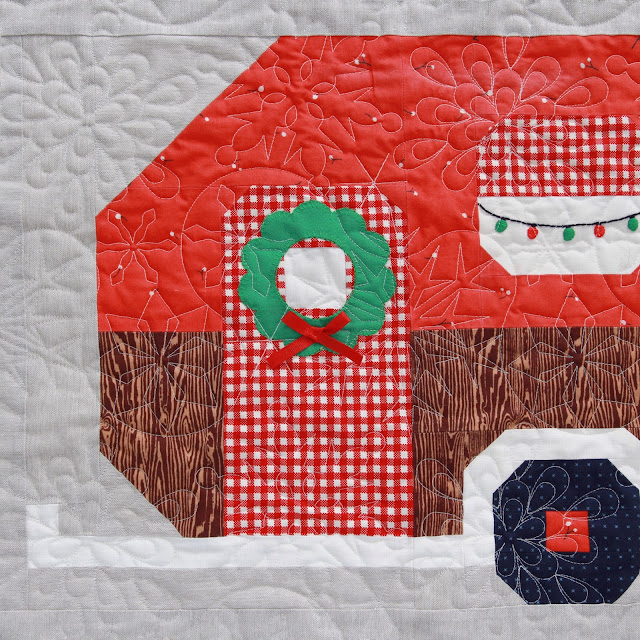
Cut out the wreath shape from the interfaced green fabric and then, with a hot, dry iron, adhere it to your camper block. I used a blanket stitch to applique my wreath to the block, but a zig-zag or straight stitch works too! Embellish your wreath as desired. I kept mine plain and only added a little red bow after it was quilted, but you could have so much fun adding details to yours!
To embroider the lights onto the camper window, you'll want to position the template underneath the camper block window (this time you'll definitely want to use a light source to trace it) and with a water soluble pen, trace the lights onto the window. I did not use any stabilizer when I embroidered mine, but you might find it necessary when you are doing yours.
Using a straight stitch, I first embroidered the strand and did a quick satin stitch for the top of the lights as I got to them (hope that makes sense!). I used a satin stitch for the bulbs as well in a red and green embroidery floss. Oh and speaking of embroidery floss, I just used 3 strands of a DMC thread for all parts of the holiday lights.
Hope all of that ☝ makes sense! Comment below or email me at PenAndPaperPatterns@gmail.com if you have any questions!
Tagged: Tutorial


0 comments