January 20 2018 – Lindsey Neill

Vegas Wedding Quilt Tips & Tricks - Part 3
After sewing the L pieces to the H/O/N and E/O/N units (H/O/N and E/O/N refers to the letters assigned to the cut pieces in the pattern), I like to trim my dog ears BEFORE pressing. With the wrong side of the unit facing up, I follow the raw edge of the unit with my scissors while trimming the dog ear. I then press the seams toward Piece L.
This was already mentioned in the pattern, but I feel it is important to really emphasis how helpful it is to finger press the center of your Block Two template units and H/O/N and E/O/N units. Line up those center creases and pin or glue in place.
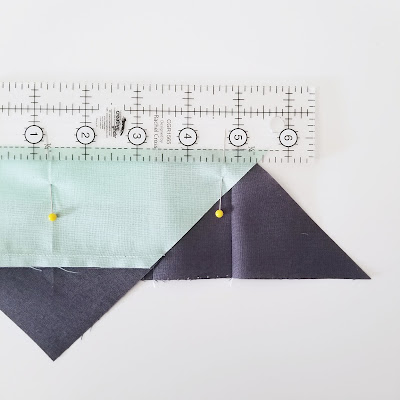
Following the tips I suggested in the second part of this series, make sure the edges of your Block Two template unit and H/O/N or E/O/N units intersect by 1/4". I've done enough of these type of units where I can pretty much just eyeball the 1/4" now, but if this is a new technique for you or you don't feel super confident about it, I recommend following the tips I suggest in the second post - where you mark the 1/4" seam allowance on your unit OR take a small ruler, after you've pinned the units together, and measure the 1/4" seam allowance to make sure it is intersecting between those two points (example pic below) before you sew them together. If it isn't intersecting perfectly, then adjust the units as necessary.
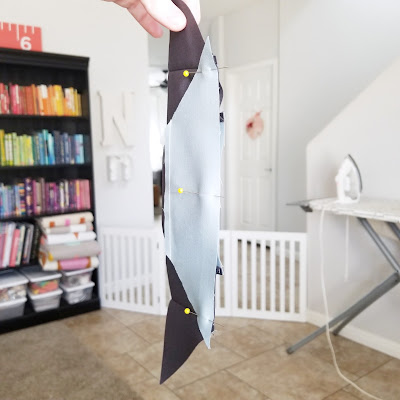
You might have some units where you have to adjust the units so much that you have some gapping after you've pinned them together. As long as the excess fabric that is causing the gapping is less than 1/4" in total, you can get rid of it by sewing your units with the gapping side face down on your sewing machine. I'm not sure the exact science behind it, but your feed dogs will work their magic and distribute that excess fabric evenly so you have no puckers or a lot of distortion in your block later on.
 |
|
I'm not sure why it appears like my gapping issue is on top...It really is the bottom piece that
is face down on my sewing machine. I promise!
|
In the meantime, feel free to email me or comment below with any questions you might have about the pattern! Happy to answer them
Tagged:


0 comments